Friday, October 12, 2012

Hanging Pumpkin Lantern


I submitted this entry to So You Think You're Crafty for Halloween week.  I had the idea for a hanging pumpkin lantern, but I wanted to to be something that would last.  I hate to spend a lot of time making something that can't be reused in the coming years.

I started with three artificial pumpkins from Hobby Lobby.  I tried to get a large, medium, and small size for a tiered effect.  I also picked up wooden embroidery hoops that were small enough to fit inside of each pumpkin.

I laid the embroidery hoop on top of the pumpkin and traced a smaller circle inside of it.  You want your cut circle to be significantly smaller than the hoop to create a lip so that the hoop will not slide out of the opening.

I used a serrated kitchen knife to cut the openings in my pumpkins.

Remove the inner portion of your embroidery hoop and completely unscrew the outer portion so that it is more flexible.  Carefully overlap the ends of the hoop until you can fit it inside the pumpkin opening.

Once it's inside the pumpkin, screw the opening closed again for stability.


I used the smallest black chain at Home Depot and hooked it around each embroidery hoop in three places.

Some of my pumpkins had holes in the bottom while one did not.  For the one with no opening, I used a drill to make three holes big enough to thread the chain through.  Once the chain was run up through the pumpkin, I hooked the lower pumpkin's chain onto the higher pumpkin's chain and it was all attached.

Obviously, you don't want to place real candles in these fake pumpkins.  I put a couple of the battery powered tealights in each pumpkin and it looks really cool when it starts to get dark.

You could really get creative with this lantern.  It would be fun to go ahead and carve jack o'lantern faces on the pumpkins or some fancy geometric designs.

Now, the only problem is deciding where I'll be displaying mine!  I loved it hanging on my covered front porch just as much as inside over the kitchen table.

I'm linking this project up to the following link parties:  

Thursday, October 4, 2012

Fit to be Tied Skirt and Accessories


How do you refashion menswear into a little girl's style statement?  For Week #2 of So You Think You're Crafty, I did it by turning castaway neckties into a twirly skirt for a little lady.  I put the word out to family and friends that I was collecting old neckties for a project and I got a great response.  I had lots of colors and patterns to choose from.

 
After choosing my ties, I starting by cutting a bunch of them in half so I would have a wide end and a skinny end.  I laid out my pattern, alternating wide and skinny ends.

I ran them through the sewing machine, right sides together.

I kept going until I had enough length for my skirt.

Then, I used one of my girls' school uniform skirts as a pattern for length and waist size.

I used some wide non-roll elastic from Jo-Ann Fabric for the waistband.

I folded the top edge of the skirt over the elastic and stitched it in place to form the waistband.  To close it all up, I turned the skirt inside out and two right sides of the ties together, just as I had on all of the other ties.  Done!

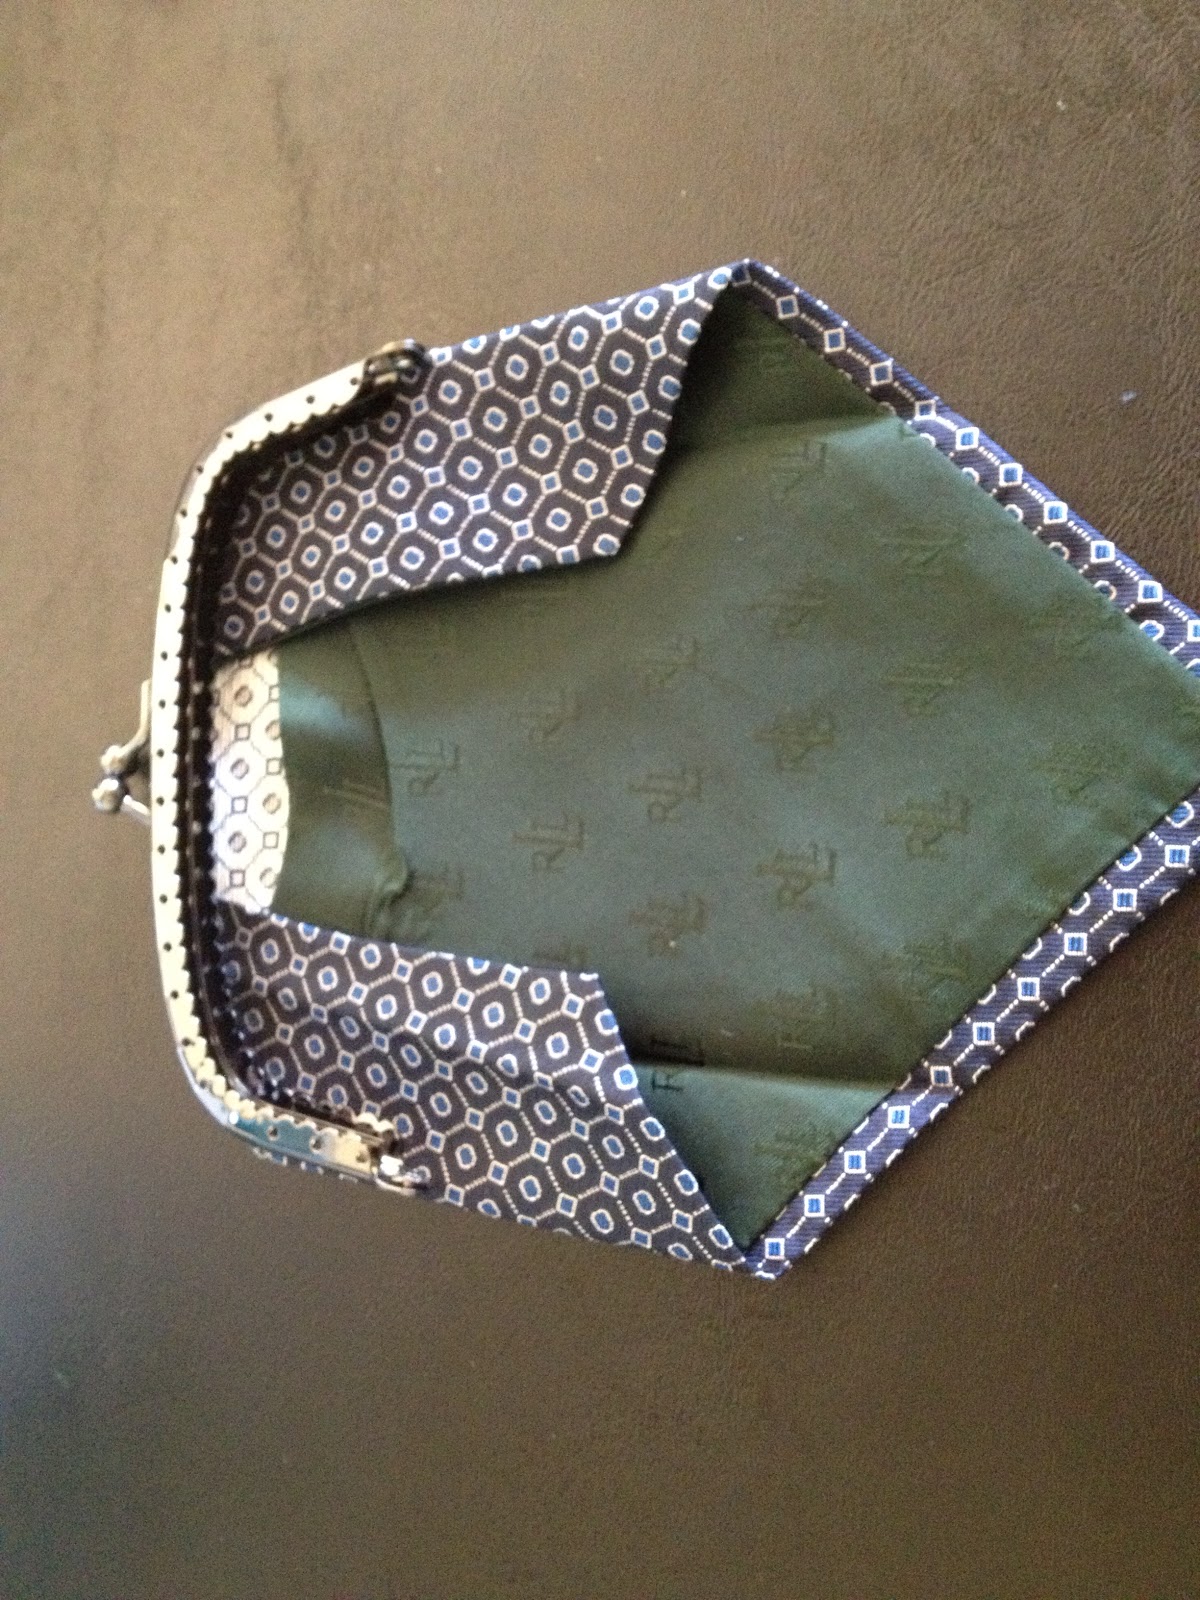
For the purse, I started with one of these purse frames from Jo-Ann.

 I opened up the wide ends of two ties and ironed them flat.

I folded the sides in to match up with the purse frame.

I used the skinny end of a tie to make a purse handle.  I pinned it all into place and stitched it up.  Once the purse frame is in place, you just hand sew your fabric to the frame.

I also used some leftover tie fabric to make some yo-yos for a hair accessory.  I stacked a few together, sewed on a rhinestone button, and hot glued it all to an alligator clip.

This little lady was quite happy with her new feminine twist on menswear!

Thanks to all of you who have been voting in the So You Think You're Crafty competition!  The contest has been a lot of fun so far.  I'm excited to see how far I get in the contest.  It's always fun to see the new projects each Monday.

Thursday, September 27, 2012

Scrap Wood Photo Display

I'm a little behind on posting my tutorials from the So You Think You're Crafty competition.  I'm going to try to get caught up, so you'll be seeing more tutorials than usual.  The theme for Week 1 was Stash Busting.  I decided to use up some of my stash of scrap wood that was hanging out in our backyard.  My husband kept trying to move some of it to the burn pile and I kept rescuing it because I knew I would need it eventually.


I chose a few pieces and trimmed some up so they would be close to the same length.  I didn't want everything exact, because I was going to distress everything to make it look old.  I laid out my pieces how I thought I wanted them (although this would change later).

 I enlisted my trusty helper to assist me with the distressing process.  We banged on the boards with all kinds of different tools.  I also added some nail holes and cut into some of the ends with a hand saw.

 I had seen lots of people rave about using steel wool soaked in vinegar to age wood, so I decided to give it a try.  On this piece of scrap, I was testing out white vinegar on the left, apple cider vinegar in the middle, and balsamic vinegar on the right.  I wanted my boards to look different, so I decided to just use all three on the different boards.


After everything dried, I laid my pieces back out and decided to remove one of the boards to make the sign a little smaller.

 I added two pieces of wood to the back to hold everything together.

I printed out my text to the size I wanted and taped everything together.

I used my favorite transfer method of scribbling with pencil on the back and then tracing the letters on the front to make a guide.

After I went over all of my letters, I think I could have skipped the scribbling step.  My pencil made a tiny indentation in the wood where I traced and it was more visible than the graphite transfer.

I set up my card table in front of the TV one evening after the kids were in bed and used my wood burning tool to go over all of my letters.  I love that thing.  It gives you a unique look that I can't achieve with any other product or tool and I think it's much easier than trying to hand paint the letters.


I picked up these railroad nails a while back without really knowing what I was going to do with them.  I just thought they looked intriguing with their embossed numbers showing the year they were used.  They turned out to be the perfect thing for this project.  I hammered two of them into my photo display to hold the jute twine for the photos.


Mini clothespins make it easy to switch out the photos seasonally or whenever we want to add something new.  I'm addicted to printing my Instagram photos from my Postal Pix app on my phone.  If you haven't tried it, you really should.  It's so easy and fun.


Wednesday, September 5, 2012

Vintage Door Headboard


I'd like to share my audition project for So You Think You're Crafty with you.  That's right, I'm competing in Season 13 of the weekly crafting competition.  The actual competition starts on September 10, so be sure to check in each week and vote for your favorite project.

I decided that it was time to whip our guest bedroom into shape.  We hadn't really done anything in there since we moved in.  It was acting as a holding ground for some furniture and other junk that didn't have a permanent home yet.  We had a queen mattress, box springs, and basic bed frame, so I decided to start with that.  We needed a fun headboard to set the tone for the room.


About two years ago, I ran across a Craigslist ad for a bunch of old doors.  The seller was asking $100, but there were about 40 doors.  Somehow, I convinced my husband that this was a good idea and he and my father in law drove a truck and trailer a hour away to pick up my treasures.  My LARGE stash of doors has been sitting in my parents' barn ever since.  I've used a couple of the doors here and there, but there are many projects still waiting to happen.  That winter (see the snow?), it was starting to warm up and I was getting the itch to get outside and work on  a project, so I started scraping the white paint off of this door.  I stuck it back in the barn and let it sit until now.

 Then a couple of months ago, my father in law tore out this old fence row.  When I started thinking about some kind of posts for my headboard, he scavenged a couple of the posts out of his trash pile for me.
 I cleaned up my door and removed any loose paint that was peeling off.  I gave it all a rough sanding, just to get any grimy parts off.  I removed the hardware to clean it and sealed the whole door with clear acrylic spray, to keep everything in place.  Then, I started laying out the posts to see where I wanted everything.

 After I got all my measurements down, I cut the posts to length and added a plastic nail-on furniture foot, just to keep it up off the carpet a little.

 I flipped the door over and used some metal brackets to screw the door headboard into the posts.

I set up my bed frame and got it ready for the headboard.

 Then, I found my cute helper who loves to use power tools.  :)

 With her help, I attached a scrap board towards the bottom of the posts.  My headboard was going to be wider than my bed frame, so I needed a place to attach the frame.

 I cut some blocks of wood to act as spacers and then screwed the frame into the board.  I added those blocks because I didn't want the frame and mattress to be too far under the door.  I was worried about my guests banging their heads on the headboard.

 Here she is, all ready to have the box springs and mattress put into place.

 Once it was all put together and the bed was made, I loved the bright pop of green even more.  The character of the door definitely shines through and I love that the fence posts found a new life instead of just going in the trash.

It's time to invite some out-of-town friends over!  This bed needs some weekend visitors!


I've linked up to these linky parties!  Go check them out!

Home Stories A2Z

Thursday, August 9, 2012

Back to School

It happened last week.  All three of my girls started school.  I was not as excited as they were.

 My twins started kindergarten this year.  All. day. long.

 They were eager and confident on their first day.  They are so ready!

However, I'm not sure that Preschool is ready for this little one.  Lily had a harder time starting preschool.  It's getting better, but it's pretty hard to be away from your mom for two mornings a week.  She'll be fine, but it's still not easy to leave your little one sobbing.

Right now, my house is too quiet.  Little sister asks if it's time to pick her big sisters up about twenty times a day.  I know we'll get used to this new routine, but change is hard sometimes!