Showing posts with label tutorial. Show all posts

Thursday, October 4, 2012

Fit to be Tied Skirt and Accessories


How do you refashion menswear into a little girl's style statement?  For Week #2 of So You Think You're Crafty, I did it by turning castaway neckties into a twirly skirt for a little lady.  I put the word out to family and friends that I was collecting old neckties for a project and I got a great response.  I had lots of colors and patterns to choose from.

 
After choosing my ties, I starting by cutting a bunch of them in half so I would have a wide end and a skinny end.  I laid out my pattern, alternating wide and skinny ends.

I ran them through the sewing machine, right sides together.

I kept going until I had enough length for my skirt.

Then, I used one of my girls' school uniform skirts as a pattern for length and waist size.

I used some wide non-roll elastic from Jo-Ann Fabric for the waistband.

I folded the top edge of the skirt over the elastic and stitched it in place to form the waistband.  To close it all up, I turned the skirt inside out and two right sides of the ties together, just as I had on all of the other ties.  Done!

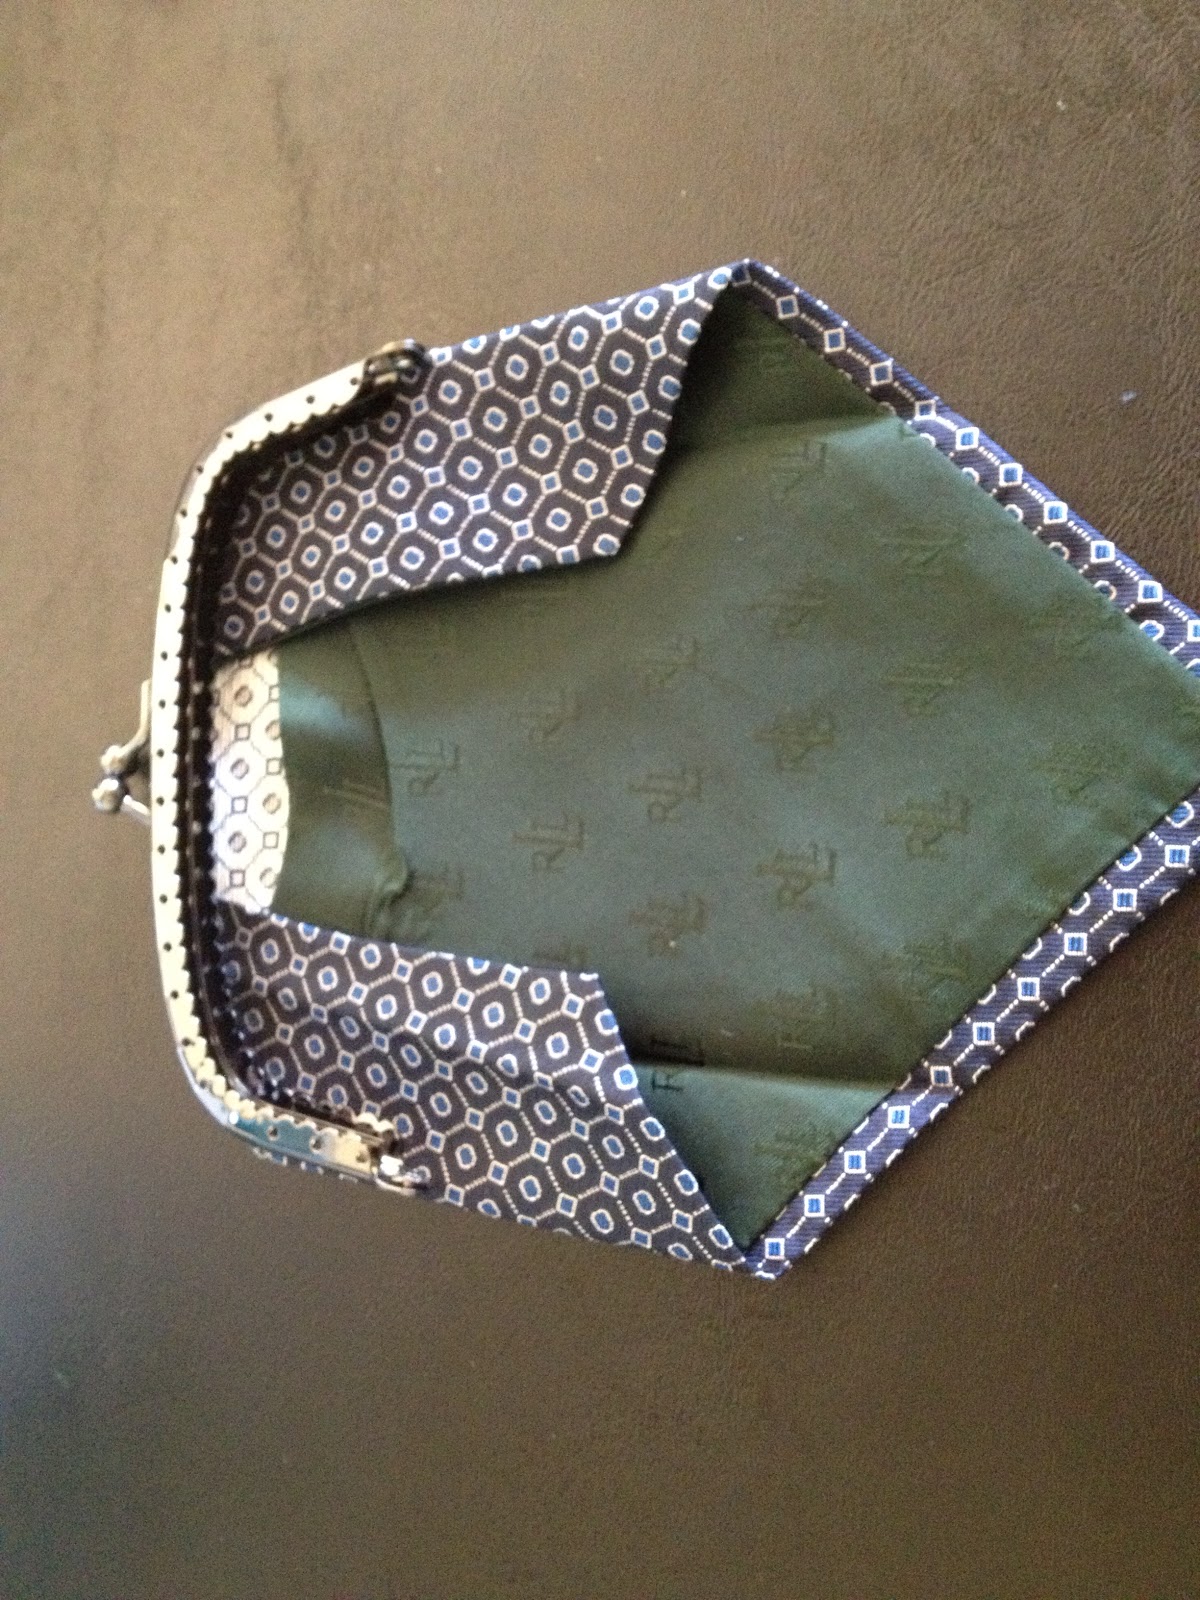
For the purse, I started with one of these purse frames from Jo-Ann.

 I opened up the wide ends of two ties and ironed them flat.

I folded the sides in to match up with the purse frame.

I used the skinny end of a tie to make a purse handle.  I pinned it all into place and stitched it up.  Once the purse frame is in place, you just hand sew your fabric to the frame.

I also used some leftover tie fabric to make some yo-yos for a hair accessory.  I stacked a few together, sewed on a rhinestone button, and hot glued it all to an alligator clip.

This little lady was quite happy with her new feminine twist on menswear!

Thanks to all of you who have been voting in the So You Think You're Crafty competition!  The contest has been a lot of fun so far.  I'm excited to see how far I get in the contest.  It's always fun to see the new projects each Monday.

Wednesday, April 25, 2012

Rainbow Dessert Stand

At my Rainbow Birthday Party for my 5 year old twins, we served a variety of desserts on a cute rainbow colored tiered stand.  I thought I'd show you a quick before and after.

These elements started out as tired, dated Goodwill finds that I usually wouldn't have given a second glance.  With a few light coats of primer and then spray paint, new life was breathed into them!

I let the plates, glassware, and wooden candlesticks cure for a few days after the paint was dry.  Then, I used E3000 glue to stick the pieces together.  I glued each candlestick to a plate and let that dry overnight and then glued it all together and let it dry overnight a second time.

Let me be perfectly clear, I completely understand that spray paint is NOT food safe.  I used paper doilies as liners on the two smaller plate tiers.  The bottom tier is an oval shape and I just couldn't get it to look quite right, so I just encouraged certain family members to eat those cookies.  Just kidding.  I just decided it wasn't that big of a deal to me and I went for it.  You can decide what you're comfortable with.  If I did it again, I would choose a round platter instead of an oval.

A few hints that might make this easier for you:
 - Use self etching primer made for metal or glass on your ceramic or glassware
 - Before applying your glue, line up your pieces and mark them with a pencil.  It's easier when it's not covered with sticky glue.
 - Try to find pieces that aren't super heavy.  Cheaper quality dishes seemed to be lighter.  You don't want the whole thing to be top-heavy.
 - Be patient!  This project requires a little planning ahead.  I spent a lot of time waiting between coats of spray paint and letting the glue dry properly.

I gently hand washed this after the party.  It seemed to hold up well.  However, I don't expect it to be an heirloom piece.  I spent less than $10 on thrift store items and used a lot of spray paint that I already had.  So considering the cost, I feel like I've already gotten my money's worth out of it!

Thursday, March 29, 2012

Snow White Party -- Cut Wood Vase Tutorial

I wanted to share a quick tutorial on this vase I made for our Snow White birthday party

The inspiration for the vase came from the wreath I made for our front door.  When I saw this one at diy kinda girl, I knew I had to have one of my own.  I made the wreath following her directions pretty closely.  I did use brown burlap instead of felt to cover my wreath form.  I added a little Happy Birthday banner out of scrapbook paper for the big day.  I loved my wreath so much when it was done that I wanted to make something coordinating for the inside.  I decided on a large vase that could hold some flowering branches from the yard.
 
Because I'm cheap, I didn't want to spend money on my base, so I started with two empty green bean cans.  These are the giant ones from Sam's Club.  I used the can opener to open up the bottom of one of the cans so that it was just an empty tube.

 I used black electrical tape (because that's what I could find) to hold them together once they were stacked on top of one another.

 Just like with the wreath, I wrapped the whole thing in brown burlap strips, secured with hot glue.

 I started gluing the wood discs on, thinking of it like a puzzle, large pieces first, then fill in with the smaller ones.
I just kept turning it around, filling in until I got close to the top.

I added some cut forsythia branches and it made for the perfect natural element to our dessert table.  I wouldn't fill the water past the top of the bottom can, just in case it's not water tight.  The vase itself is pretty heavy with all of that wood, so it could really hold some tall branches and make a large visual statement.

If you're interested in seeing the other details of our Snow White party, check these out:

Wednesday, March 21, 2012

Garden Gate Sign Tutorial


I was going through my Pinterest boards and found this pin from quite a while ago. I really liked the quote and wanted to use it on my own sign.  I'm not sure of the original source of the quote.  Anyone happen to know?
 

 I started with seven rough wood fence pickets from Home Depot.  They were a little over $1 each.  I gave them a rough sanding and enlisted my three favorite helpers to paint.  I turned them loose with the acrylic craft paint and told them to paint each one a Spring-y color.


Keep in mind that these have a very rough paint job.  I left them exactly the way and four year olds and two year old did it.


Once they were dry, we gave them a coat of antique white.


Then my helpers happily distressed them with hammers and screwdrivers.  I also sanded the super rough spots and the edges at this point so that some of the color would peek through.

I didn't take a picture, but I also cut two strips of scrap wood and nailed them across the front to hold everything together.
 

I played with the quote in some different fonts and printed it out big once I found what I wanted.  I laid it all out on the table to get my spacing right.
 

I used the old fashioned carbon paper substitute of scribbling on the back of the paper with pencil and then tracing on the front with a pen.


It gave me enough of a line to get an idea of where my letters should be placed.


 I used acrylic craft paint that was very watered down and just filled in my letters.  Once it dried a bit, I went back and added some more color here and there until I liked it.  I had some trouble getting the yellow letters to show up once it was up on the mantel, so I ended up outlining the yellow letters with a yellowish orange Sharpie.  You don't really notice the outline, but it made a big difference on being able to read the words.


 It's now the centerpiece of my Spring mantel.  It helped to lighten up the space and I love that my girls were able to help with the project!

Monday, March 19, 2012

Reclaimed Cabinet turned Vanity

Once upon a time, okay, more like two years ago, we found ourselves in a guy's garage looking at some antique furniture that was advertised on Craigslist.  The furniture didn't really turn out to be what we were looking for, but we did spy this old wall cabinet in the corner.


It was very worn, had different colors of chipping paint, and was extremely dirty.  But, it was pretty sturdy and it had some cool old writing on the side.  It looks like maybe someone used pieces of wood from a shipping crate to make this at one time.  That's my best guess, anyway.

We weren't exactly sure what we would do with it, but my husband suggested transforming it into a table or maybe even a bathroom vanity.  Love that guy.  So, we brought it home and it sat for quite a while.  Fast forward a couple of years and we dug it out during our housebuilding process and planned to use it as a vanity in our powder bath.


After a rough cleaning, we turned our copper sink bowl over and laid it out to get the placement where we wanted it.  We traced around the outer edge lightly with a pencil.

We drilled a hole to get started with the jigsaw.

We made sure to cut on the inside of our traced line so that there would be an edge for the sink bowl to rest on.


After our hole was cut for the sink, I cleaned the entire box and then I cleaned, cleaned, and cleaned it some more.
   
We decided to use a spray polyurethane to protect it against water as much as possible.  I also wanted to seal in everything that was already on the box.  Even though I cleaned it as thoroughly as possible, the paint was old and who knows what had been on or in that box in the past.


The inside and outside of the box got at least three good coats of polyurethane.


When it came time for installation, we bought plumbing pipe, couplers, and flanges at the hardware store and built a simple base for the vanity.  We kept it simple and used two legs and then had return pieces that would screw into the wall with the flanges.  The return pieces also allowed us to have a storage shelf about half way down the legs.


 At this point, we also cut holes in the bottom of the box to allow for the plumbing to attach to the sink basin and drilled the hole for the faucet.  After dropping the sink basin in and attaching all of the plumbing, we attached the sink a bit more permanently with clear silicone under the lip of the basin.


I love it!  It looks great with the rest of the house and it's definitely a conversation piece.


For the shelf, I cut two lengths of barn floor boards leftover from our kitchen shelving project.  They are simply resting on top of the pipe.  I added an old metal bread basket from a bakery to hold toilet paper and a small basket of essentials.


It's been in use almost three months now and the water has not been a problem.  I have tried to train my kids to wipe up any water drips on the wood, but it still happens.  So far, it still looks good as new, well, good as old?

Wednesday, February 29, 2012

Chalkboard Beer Flight Paddles


For Christmas, I bought my husband a set of beer flight paddles and tasting glasses.  I will admit, it was one of those gifts that was sort of for me as well.  He is a homebrewer and has converted me to a beer lover.  The idea of being able to try several different types in a small amount is really fun to me.  I love it when we're visiting a new city and a restaurant or bar will offer a local beer flight.


I bought the wood paddles and glasses through The WEBstaurant Store.  You have to buy a large quantity, so you might want to go in with a friend or split them up as gifts.  I've seen them in smaller quantities other places, but it was much cheaper to buy a few more.  I figure it will be fun at parties to have a bunch.

Whenever we have people over, they always want to try out his beer.  I thought it would be fun to have some flight paddles so people could sample a few types.  It's hard to keep track of the different types and figure out what you like, especially if you're not an experienced beer aficionado.  So, chalkboard paint seemed like a logical choice for labeling the beer.


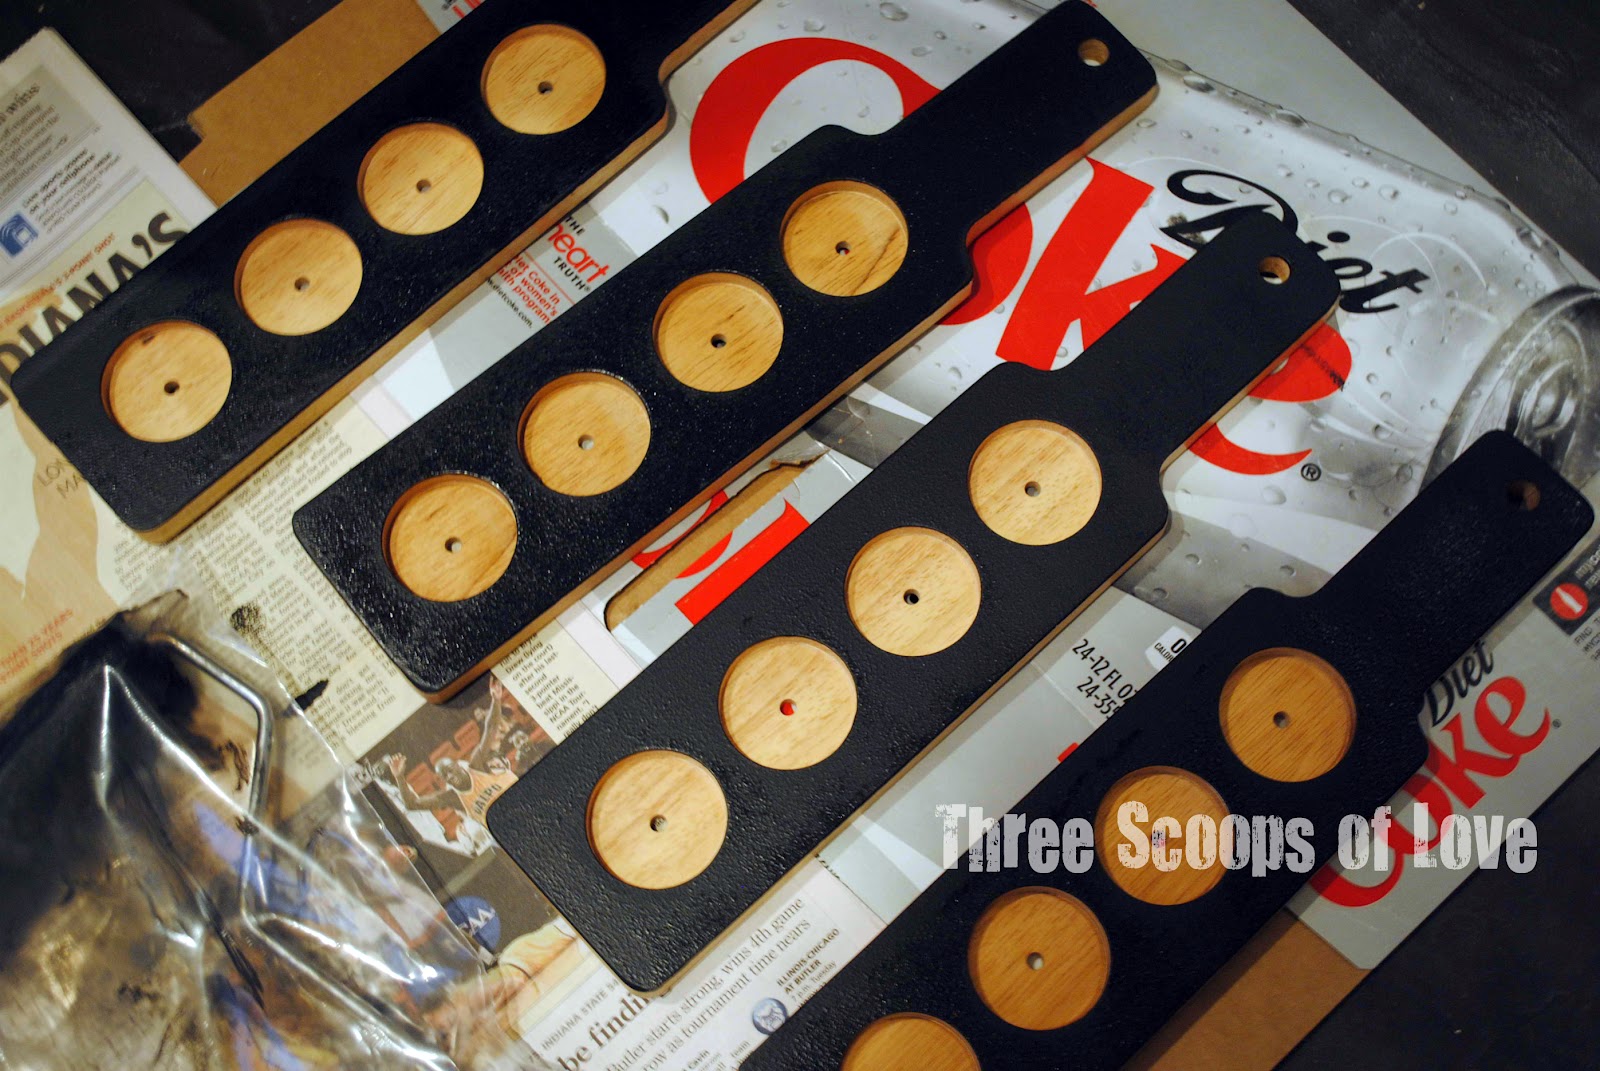
I put a thin coat of primer on the very top of the paddles.


After that dried, I added two coats of chalkboard paint.  Following the directions, I let it cure for three days before I seasoned it with chalk and started writing on them.


Simple and easy--my kind of project.


I used a chalk marker to write on these.  I find that's it easier when you're working with a small space.


These were already poured, so I had to drink them.  You can't let beer go to waste!  Can you tell which one was my favorite?  Flat 12 Half Cycle IPA is where it's at!