Showing posts with label repurposed. Show all posts

Wednesday, October 24, 2012

Wind Turbine Light Fixture


I was pretty excited about the Hardware Store Week challenge at So You Think You're Crafty.  Lowe's is my absolute favorite store, followed by Home Depot for a close second.  It's so fun to walk around the aisles and try to see a new use for all of those supplies.

I had seen vintage turbine fans turned into light fixtures on some pricey websites.  All that I had seen were well over a couple hundred dollars.  I loved the look, but couldn't justify the price.  I needed a light fixture for my craft studio and I had a feeling I could DIY my own version.

I started with a wind turbine exhaust fan from Lowe's.  It was about $35, but I have since seen a few on clearance at my local Lowe's.  I think these are mainly used in attics or barns.  They came in a couple of different colors, but I planned on painting mine, so I wasn't picky.

Here's what she looked like after taking her out of the box.  There are basically two pieces.  In addition to this fan piece, there is a tube type of piece that the fan sits on.  I didn't use any part of that piece for this project, but maybe I can find a new use for it in the future.

At this point, my dad and I just started taking pieces apart.  We were trying to get all of the "extra" pieces off so that we were left with just the fan blades for the light fixture.  This little plastic piece was at the top, holding the apparatus that allowed the thing to turn.  We pried it off with a screwdriver.

We started unscrewing pieces, trying to cause the least amount of damage.  We still wanted it to be structurally sound, but I didn't want all of the inner workings.  They would be in the way of my pendant light.

We ended up doing more work than we had to.  In the end, we just took some metal snips and cut the three support bars that were holding all of the pieces in.  Once those were cut, we were left with the outer shell which was going to function as the shade for the fixture.

At Lowe's, I picked up one of the pendant light kits.  It was sold in the small endcap area with different types of glass shades so that you can mix and match to make your light fixture.

 I unscrewed the metal rod that covers the electrical wiring and threaded this part of the fixture up through the bottom of my shade.  Then, I had to thread the wiring back through that metal rod and screw the rod back into the fixture.  Basically, think of it as sandwiching your shade (the exhaust fan) between the light socket and the metal pendant rod.

Here she is, all ready for paint!  I gave the whole thing a couple of good coats of oil rubbed bronze spray paint, let it dry well, and it was ready to go!

The light fixture now hangs in my studio and casts the prettiest design on the ceiling when the light is on in the evenings.  It's the first thing that gets a comment when people walk into that room.  Everyone wants to know more about it.

Home Stories A2Z


Funky Junk's Saturday Nite Special

Monday, October 15, 2012

Quilt Calendar


Sometimes you end up with family "heirlooms" that you're not quite sure what to do with.  I had this old quilt that was stained, tattered, filled with holes, and quite literally falling apart.  I don't like it when things just get stored away and never seen, so I knew I needed to come up with a way that we could enjoy this piece of the past.  Week #4 of So You Think You're Crafty had the theme of Sentimental, so I thought this would be the perfect entry.

Normally, I wouldn't dream of cutting up an antique like this, but it was really no good to anyone otherwise.  So, I cut out a rectangle of the quilt, paired it with an open back frame and some glass, and used my embroidery skills to make a wall calendar.


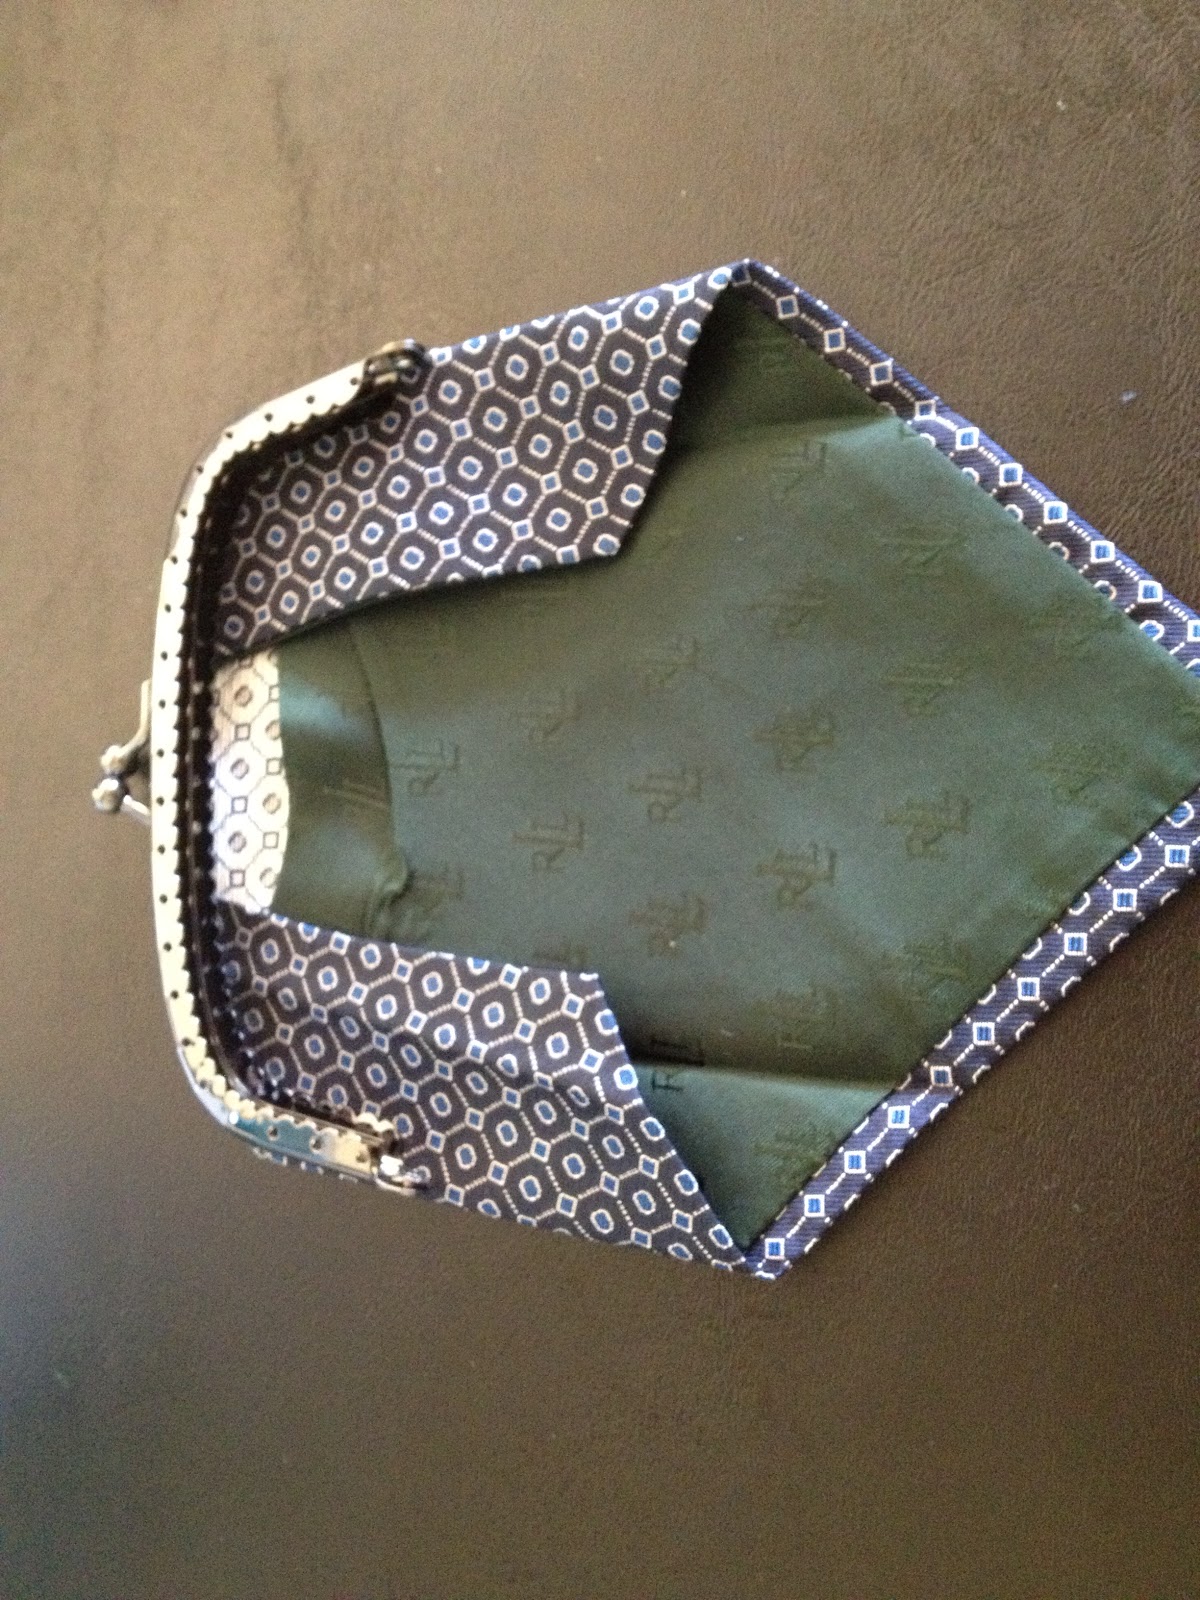
If I'm embroidering text, I always start off in Microsoft Word to get a font and size that I like.  I print off my text and tape it up on a window.  You could also use a lightbox, but I was too lazy to dig mine out.

I then tape my piece of fabric, unbleached muslin in this case, over the text.  I use a water soluble fabric marker to then trace the letters onto my fabric.

There are a ton of embroidery tutorials out there, but I'll give you the basics.  I'm not an expert, but I get by.  I usually use three strands of embroidery floss and try to keep my stitches super small on text.  It helps to keep the curves looking good on the letters.  Start by pushing your needle up through the fabric ahead of where you want your stitch.

 
Then, go back down through the fabric overlapping the last stitch slightly.  I push my needle through the last stitch.  I think it makes it look more like a solid line.

After I stitched my days of the week, I trimmed each one to have roughly the same size border around each word.  I didn't finish off the edges at all.  I wanted it to look a little rough and worn.

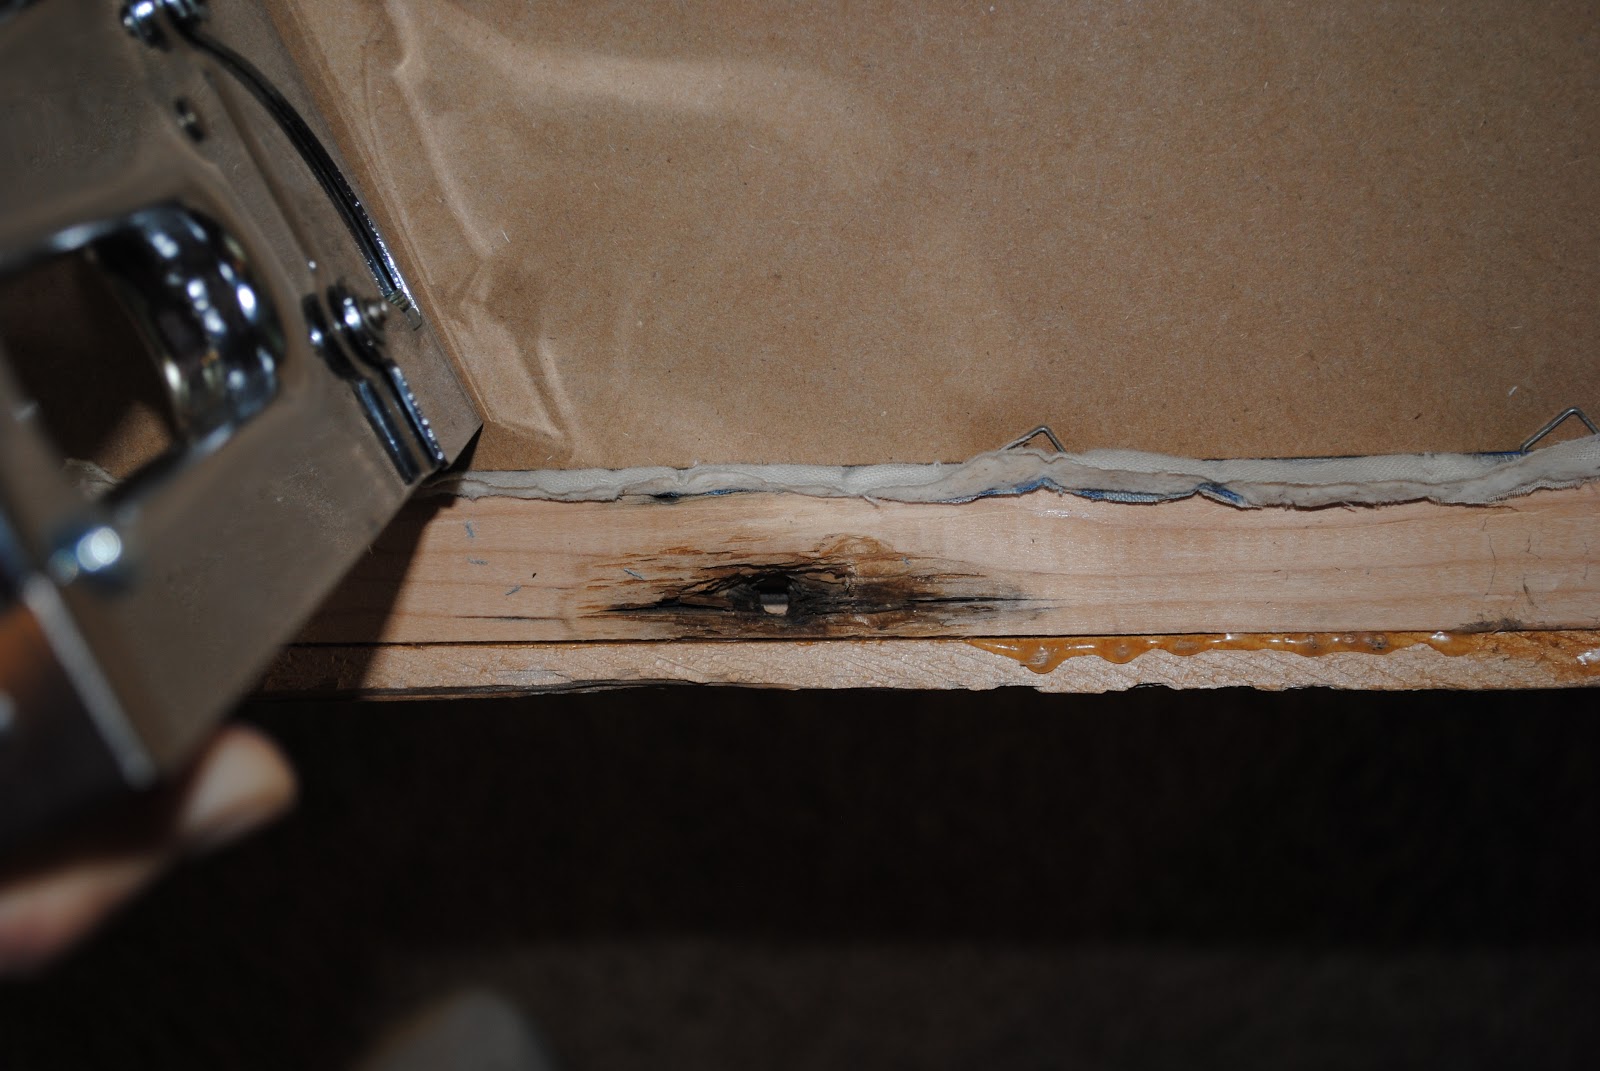
I laid my tired, old quilt out and picked out a useable area to work for my calendar.  I picked up my barnwood open back frame at Hobby Lobby (wait til it's on sale or use a coupon) and got a glass and backing kit at Michael's.

I cut a rectangle out of the quilt that was about 2" larger than the frame opening.  I laid my days of the week labels where I wanted them, along with a larger piece of blank muslin to use for the month label.  You could also stitch these into place, but I just sandwiched them between the quilt and the glass.

Once everything was in place, I flipped it over and set it all into the frame.  I squished the backer board down into place and trimmed up any edges that were sticking out too much.

I used a staple gun to place staples at angle to hold my backer board in place in the frame.  If I ever want to change something or use the frame for something else, they will be easy to pull out with pliers.

I added a large sawtooth hanger and it was ready to hang!

The grid pattern of the quilt makes up the calendar blocks for each day of the month. 

A dry erase marker makes it easy to change the month and dates.  I opted not to embroider the months onto fabric because I knew that it would be December and our calendar would still say July.  So, I left that strip of fabric blank so I can just change the month with a dry erase marker.

This dilapidated quilt has found a new life in our mudroom, where it gives my family a quick glance at our month.  Even though it was cut, the quilt is sure to be appreciated more now that it's a part of our daily routine instead of folded away in a box.


Home Stories A2Z


Funky Junk's Saturday Nite Special

Thursday, October 4, 2012

Fit to be Tied Skirt and Accessories


How do you refashion menswear into a little girl's style statement?  For Week #2 of So You Think You're Crafty, I did it by turning castaway neckties into a twirly skirt for a little lady.  I put the word out to family and friends that I was collecting old neckties for a project and I got a great response.  I had lots of colors and patterns to choose from.

 
After choosing my ties, I starting by cutting a bunch of them in half so I would have a wide end and a skinny end.  I laid out my pattern, alternating wide and skinny ends.

I ran them through the sewing machine, right sides together.

I kept going until I had enough length for my skirt.

Then, I used one of my girls' school uniform skirts as a pattern for length and waist size.

I used some wide non-roll elastic from Jo-Ann Fabric for the waistband.

I folded the top edge of the skirt over the elastic and stitched it in place to form the waistband.  To close it all up, I turned the skirt inside out and two right sides of the ties together, just as I had on all of the other ties.  Done!

For the purse, I started with one of these purse frames from Jo-Ann.

 I opened up the wide ends of two ties and ironed them flat.

I folded the sides in to match up with the purse frame.

I used the skinny end of a tie to make a purse handle.  I pinned it all into place and stitched it up.  Once the purse frame is in place, you just hand sew your fabric to the frame.

I also used some leftover tie fabric to make some yo-yos for a hair accessory.  I stacked a few together, sewed on a rhinestone button, and hot glued it all to an alligator clip.

This little lady was quite happy with her new feminine twist on menswear!

Thanks to all of you who have been voting in the So You Think You're Crafty competition!  The contest has been a lot of fun so far.  I'm excited to see how far I get in the contest.  It's always fun to see the new projects each Monday.

Tuesday, April 17, 2012

Multi Purpose Milk Box

We have a vintage metal milk box that lives in the corner of our powder bath. I picked it up at a garage sale for $5 about a year ago.  


I love things that serve multiple functions.  This little milk box holds a few basic cleaning supplies that I don't want to be visible on the shelf under the sink.  (Obviously, you would want to keep them in a more secure location if you have small children in the house who might ingest hazardous materials!)


I wasn't planning on it serving this purpose, but it didn't take long for my youngest to figure out that it also makes a handy step stool.  You will usually find it right smack in front of the sink instead of tucked away in the corner.  We're still working on putting it back in it's place.  :)

After I realized that this was going to become a habit, I stuck some felt furniture pads on the bottom so it wouldn't scuff the floor as she was dragging it.

It's not what I originally intended, but sometimes happy accidents are the best ones!

Friday, March 16, 2012

Powder Bath Reveal


Here she is!  Our powder bath has been mostly done since we moved in, but we finally finished her off with a few accessories.  I couldn't wait to share some pictures.  I'll follow up next week with all of the details.
 
 The shining star of this bathroom is our custom vanity.  We repurposed an old wood wall cabinet into a vanity by cutting some holes for a drop-in copper sink and the plumbing.  We made a base out of plumbing pipe and cut some barn flooring boards (leftover from our kitchen shelving project) to lay across the pipe as a shelf.


 I loved that there was still hand painted labeling visible on one end of the cabinet, so I made sure to position it so that we could still enjoy it.  It's so cool to think about the history of this and try to imagine who wrote those words.


The sink and vanity definitely get a reaction when visitors pop into the restroom.


 On the small wall adjacent to the vanity hang a piece of subway art that I made for my husband a couple Christmases ago and a vintage Coke crate that's being used as a shadowbox.  The subway art has names of the streets surrounding his college alma mater.  The Coke crate shadowbox holds tiny pieces with sentimental value and lots of our girls' treasures.

Check back next week and I'll share all of the details on how we made the sink and other fun accessories! 

Update:  You can find the tutorial for the wall cabinet turned vanity here.

--Source List--

Paint color: Sherwin Williams Armagnac
{our entire house is painted with colors from the HGTV Urban Organic Color Palette}

Copper Sink: Simply Copper

Hammered Copper Mirror: Tres Amigos

Overhead Light: Barn Light Electric

Trash Can: Home Goods