Sometimes you end up with family "heirlooms" that you're not quite sure what to do with. I had this old quilt that was stained, tattered, filled with holes, and quite literally falling apart. I don't like it when things just get stored away and never seen, so I knew I needed to come up with a way that we could enjoy this piece of the past. Week #4 of So You Think You're Crafty had the theme of Sentimental, so I thought this would be the perfect entry.
Normally, I wouldn't dream of cutting up an antique like this, but it was really no good to anyone otherwise. So, I cut out a rectangle of the quilt, paired it with an open back frame and some glass, and used my embroidery skills to make a wall calendar.
If I'm embroidering text, I always start off in Microsoft Word to get a font and size that I like. I print off my text and tape it up on a window. You could also use a lightbox, but I was too lazy to dig mine out.
I then tape my piece of fabric, unbleached muslin in this case, over the text. I use a water soluble fabric marker to then trace the letters onto my fabric.
There are a ton of embroidery tutorials out there, but I'll give you the basics. I'm not an expert, but I get by. I usually use three strands of embroidery floss and try to keep my stitches super small on text. It helps to keep the curves looking good on the letters. Start by pushing your needle up through the fabric ahead of where you want your stitch.
Then, go back down through the fabric overlapping the last stitch slightly. I push my needle through the last stitch. I think it makes it look more like a solid line.
After I stitched my days of the week, I trimmed each one to have roughly the same size border around each word. I didn't finish off the edges at all. I wanted it to look a little rough and worn.
I laid my tired, old quilt out and picked out a useable area to work for my calendar. I picked up my barnwood open back frame at Hobby Lobby (wait til it's on sale or use a coupon) and got a glass and backing kit at Michael's.
I cut a rectangle out of the quilt that was about 2" larger than the frame opening. I laid my days of the week labels where I wanted them, along with a larger piece of blank muslin to use for the month label. You could also stitch these into place, but I just sandwiched them between the quilt and the glass.
Once everything was in place, I flipped it over and set it all into the frame. I squished the backer board down into place and trimmed up any edges that were sticking out too much.
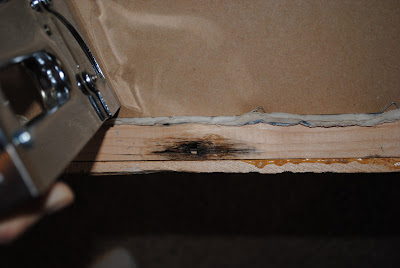
I used a staple gun to place staples at angle to hold my backer board in place in the frame. If I ever want to change something or use the frame for something else, they will be easy to pull out with pliers.
I added a large sawtooth hanger and it was ready to hang!
The grid pattern of the quilt makes up the calendar blocks for each day of the month.
This dilapidated quilt has found a new life in our mudroom, where it gives my family a quick glance at our month. Even though it was cut, the quilt is sure to be appreciated more now that it's a part of our daily routine instead of folded away in a box.


Wonderful idea!
ReplyDeleteI like a perpetual type calendar. You can use this all year!
Better to use the old and dilapidated that has meaning than to toss, I say.
via fji, Pat
I really appreciate how this blog breaks down complex topics into easily understandable sections. It's both informative and enjoyable to read.
ReplyDeletehttps://www.discountdrift.com/
I found this blog to be exceptionally well-crafted. The author's ability to present complex ideas in an accessible way makes it a valuable resource for readers.
ReplyDeletehttps://www.couponsstudio.com/